Raspberry Pi 4 Nas Setup

About the Setup
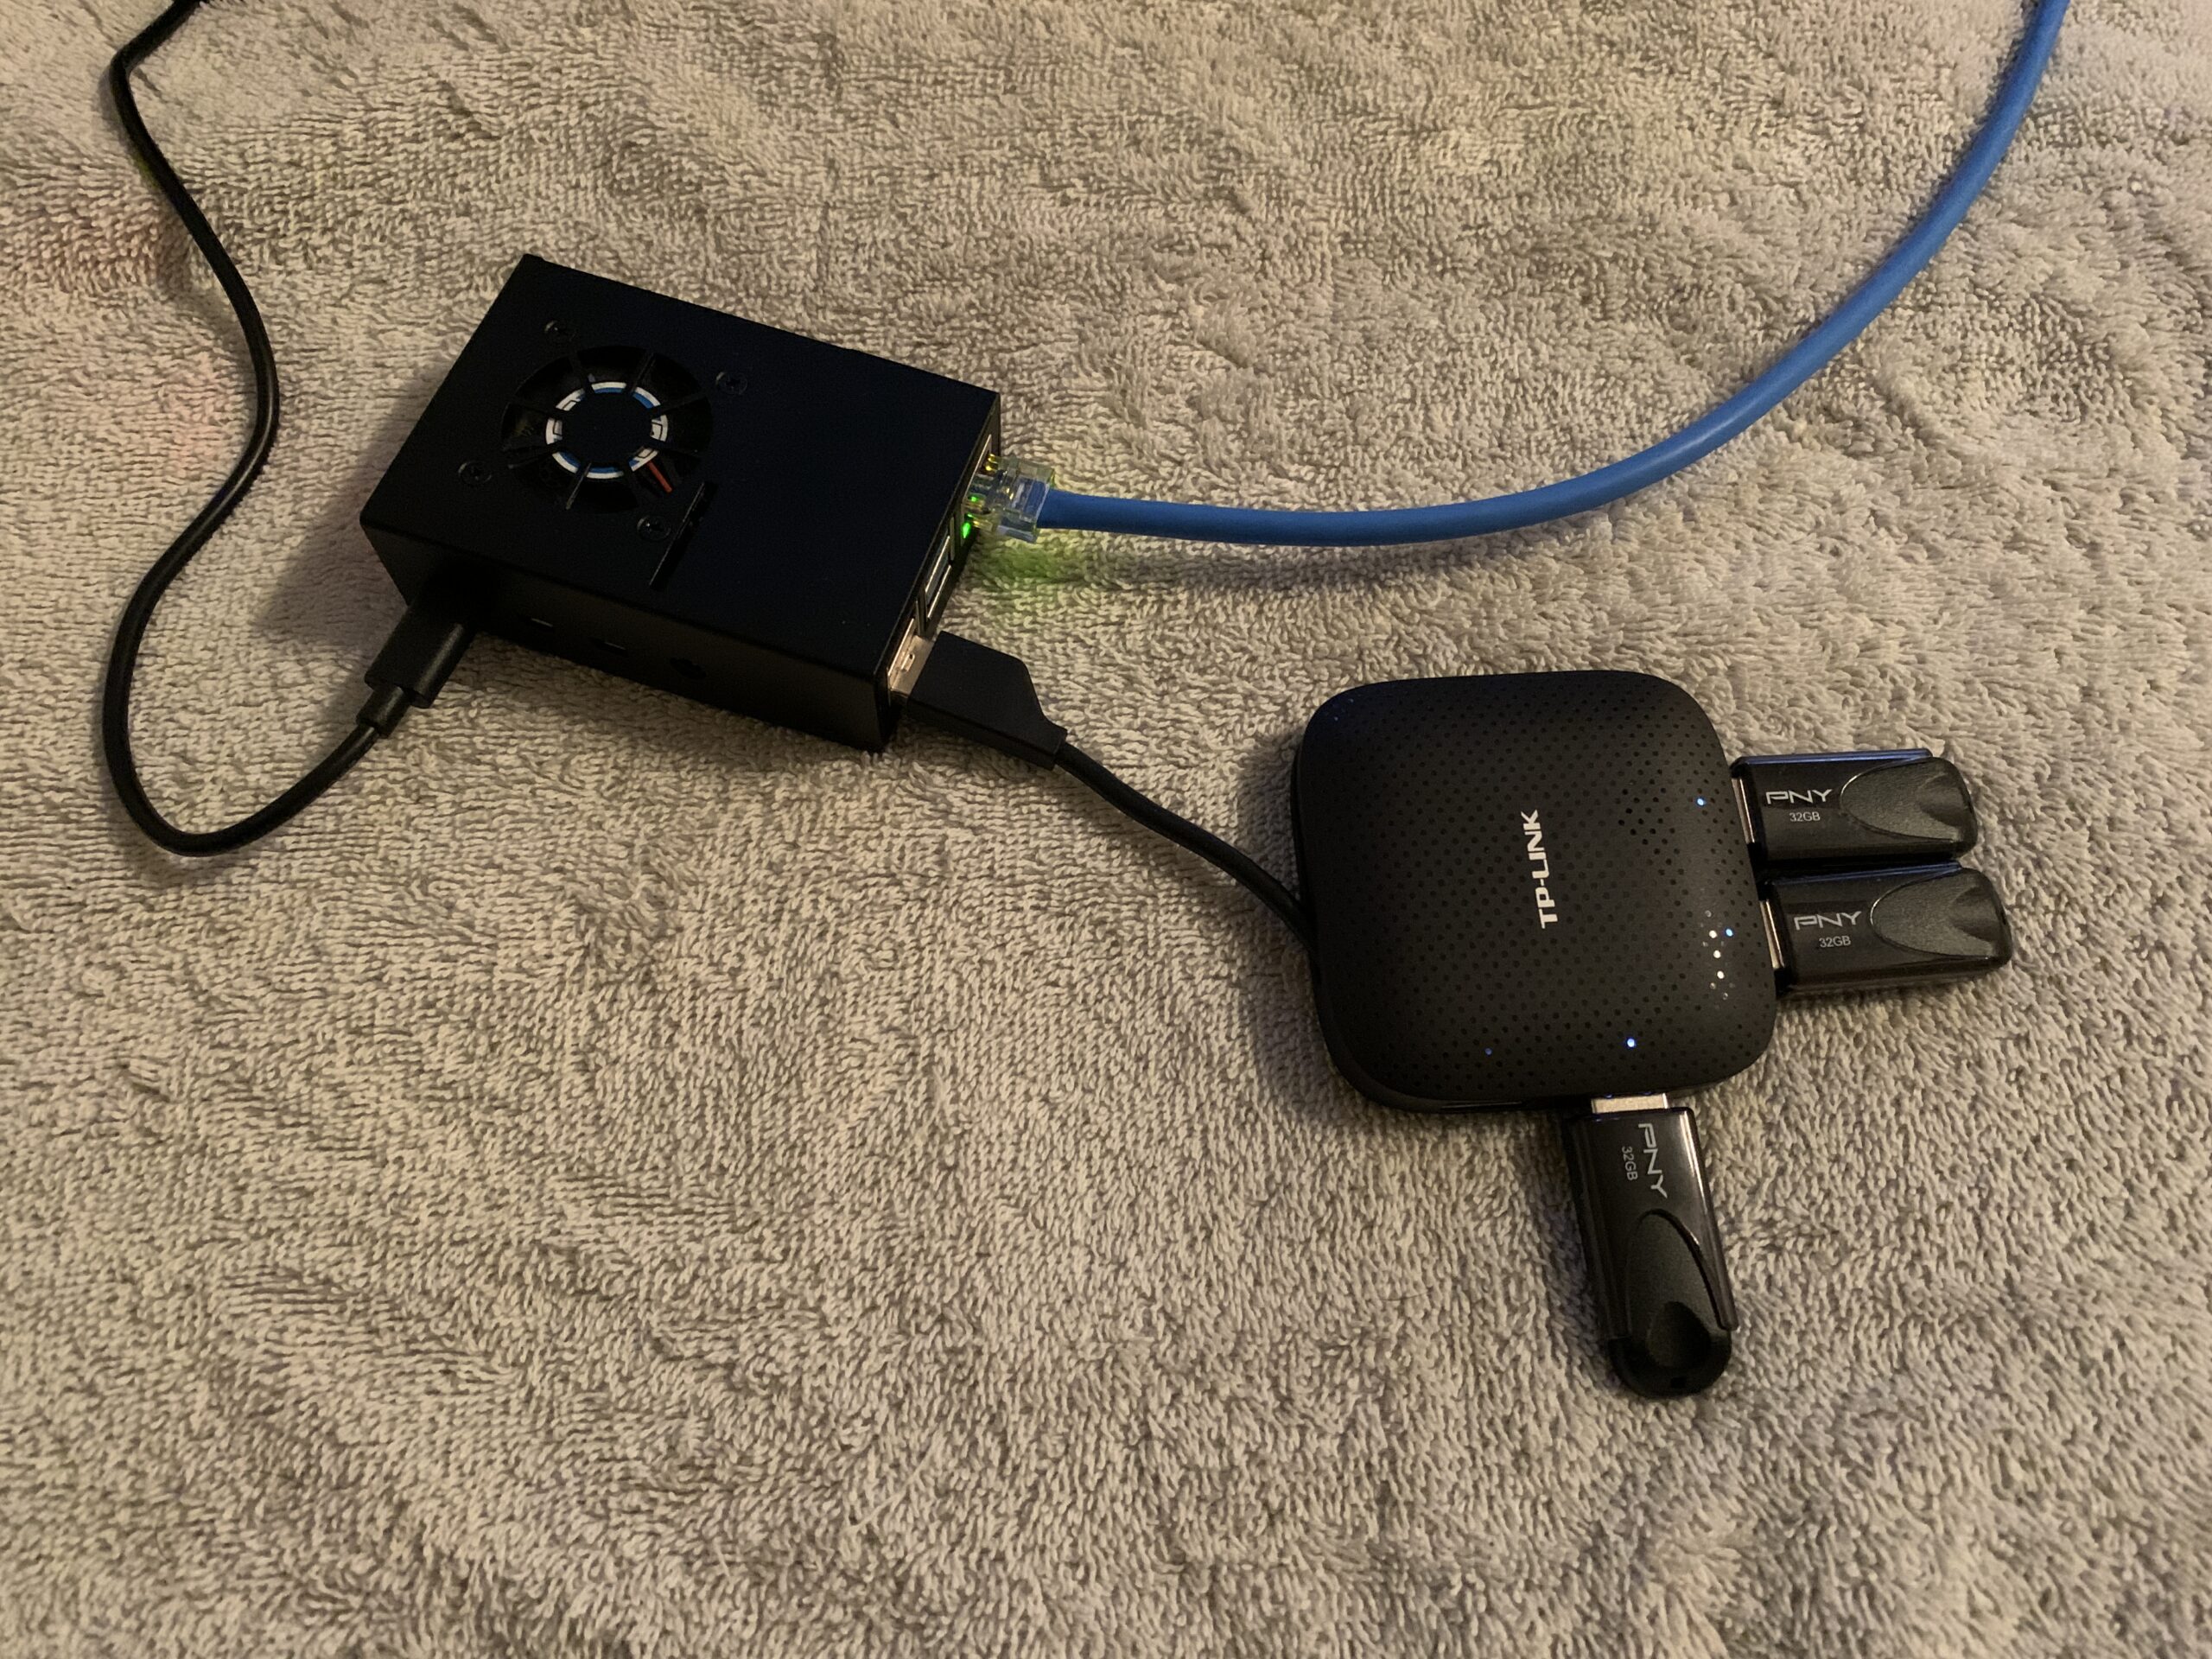
Want to make a NAS (Network Attached Storage) with your Raspberry Pi 4 and three extra USB’s laying around? I will go over the steps on how I turned the Raspberry Pi 4 pictured above into a Raid 5 NAS. First I will go over the steps to make the Raid 5 NAS and at the end discuss the performance I got out of this setup.
What you will need.
- Raspberry Pi 4
- USB Thumb Drives, HDD’s or SSD’s
- USB Hub 3.0 (Optional)
- Ethernet Cable
Prepare the Raspberry Pi 4
First step is to burn the Raspberry Pi OS Lite to the MicroSD card that will be placed into the Raspberry Pi 4. I use Rufus for burning images to USB’s and SD Cards. I leave all the settings as default and choose the image I want to burn and the drive letter of my MicroSD card. Once created you will need to plug the Raspberry Pi into a monitor using the HDMI and you will need a keyboard and mouse. Power on the Raspberry pi and once you get to the CLI (Command Line Interface) you will need to enter the command.
sudo raspi-configFrom the menu select Interfacing Options and then enable SSH. Also make sure to change your password and change the Hostname. Next we will update the OS by inputting the following two lines in the CLI.
sudo apt update
sudo apt -y upgrade
Connect to your Pi using Putty (Optional)
From here I disconnected my pi from my monitor and accessed the Raspberry Pi from my computer using Putty. I gave my Raspberry Pi a static IP address in my router and SSH into it. Once the Nas is setup we will do this again but with FTP. You can continue on with the Pi connected to your monitor if you don’t want to mess with this step.
Add your drives
Plug in the drives you have selected to use. Make sure all the drives are the same size. In my case I did three 32 gb thumb drives. Also note I did Raid 5. You can do any Raid you want, just make sure you have the correct amount of drives needed for your configuration. For the drives I would go with USB 3.0 and if you need more then two drives you will need a USB Hub. The Raspberry Pi 4 has two USB 3.0 ports. Once all the drives are connected type the following into the CLI.
lsblkThis command will show you the drives you have connected to the Raspberry Pi. They should say ‘sda’, ‘sdb’ and so on for how many drives you have.
Partition your drives
Next we will partition the drives using fdisk. So in the CLI type the following.
sudo fdisk /dev/sdaWhen prompted for a command type ‘n’ for new partition. If it says a partition already exists type ‘d’ to delete it. You will lose all data on the partition. Next enter ‘p’ for Primary Partition. You will then be asked about sectors a few times, just type ‘enter’ until you see that the partition has been created. Finally type ‘w’ to write changes to the disk. At this point I backed out of the fdisk and reentered using the command above but for your next drive. See the example below.
sudo fdisk /dev/sdbYou will repeat this step for each drive you have. I did three so my last drive was ‘/dev/sdc’.
Let’s create our Raid!
As stated above I did Raid 5 which is striping with parity. For an explanation of Raids please view this handy website from PrePressure. Find which Raid works in your situation so we can type it correctly below. First we need to install the Raid software on the Raspberry Pi by typing.
sudo apt install mdadmAfter installation you need to now create the Raid using the following command. next to –level= put in your Raid level. Next to –raid-devices= put in how many drives you have. Finally at the end type in all your drives you created using fdisk. Below is my setup for three hard drives and Raid 5. Your input may be different.
sudo mdadm --create --verbose /dev/md0 --level=5 --raid-devices=3 /dev/sda1 /dev/sdb1 /dev/sdc1Mount the Drives
Next we will format and mount the single drive we created ‘/dev/md0’. Below where it says raid1 you can name that whatever. You can specify the Raid number used or like I did just called it raid1.
sudo mkdir -p /mnt/raid1
sudo mkfs.ext4 /dev/md0
sudo mount /dev/md0 /mnt/raid1/
ls -l /mnt/raid1/
After running the ls command you will see one folder called lost+found. Next we will make the drive mounted each to we boot the Raspberry Pi.
sudo nano /etc/fstabAt the end you will add the line.
/dev/md0 /mnt/raid1/ ext4 defaults,noatime 0 1To quit use Ctrl+X and type ‘Y’ to save the changes. So the Raid starts corrected run the following command.
sudo mdadm --detail --scan | sudo tee -a /etc/mdadm/mdadm.confReboot the OS (CLI: shutdown now) and you should have ‘/mnt/raid1’
Install Samba
To share files we will need to install Samba.
sudo apt install samba samba-common-binChoose default options if asked. Next we will create a directory in the /dev/mnt folder named shared. You can name the folder anything you like.
sudo mkdir /mnt/raid1/shared
sudo chmod -R 777 /mnt/raid1/shared
Next we need to update Samba’s config file so the folder will be shared on the network.
sudo nano /etc/samba/smb.confAt the end of the file add the following.
[shared]
path=/mnt/raid1/shared
writeable=Yes
create mask=0777
directory mask=0777
public=no
Hit Ctrl+X and type ‘Y’ to save changes. Next we will restart Samba with the following.
sudo systemctl restart smbdNext we need to give users access to the shared folders. Lets grant access to the user ‘pi’ and change the password.
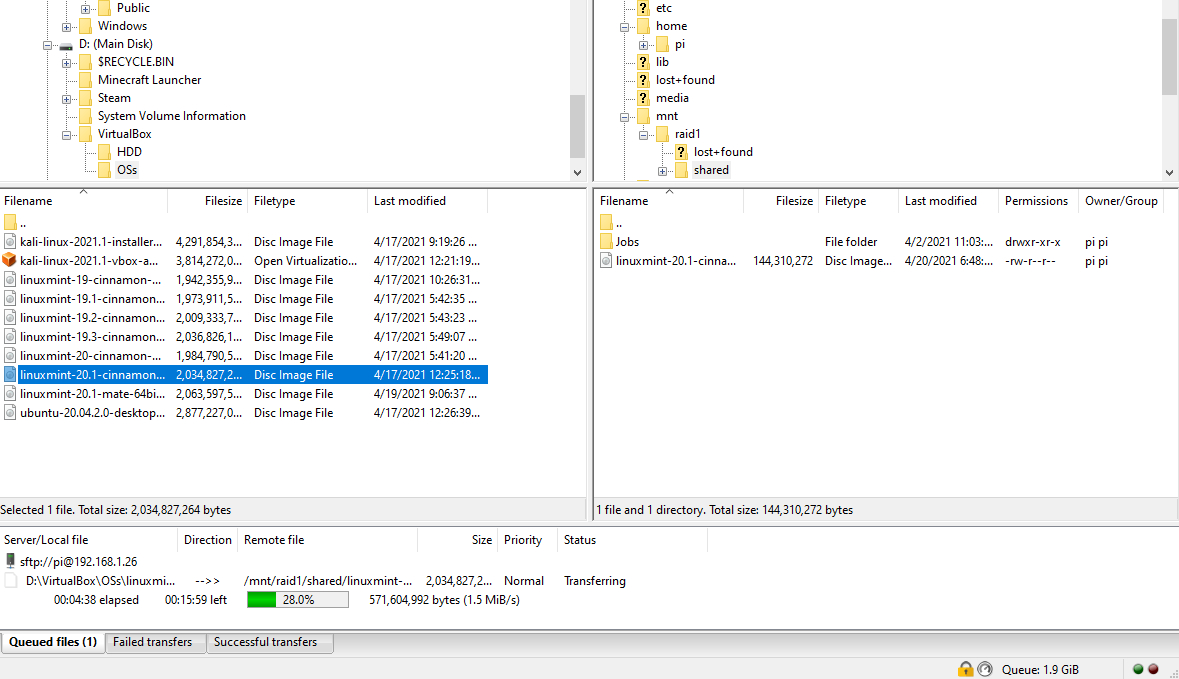
sudo smbpasswd -a piChoose a password you want for the ‘pi’ user. Once done the user can access the Rapsberry Pi NAS from other OS’s such as Windows, Mac, etc. From my Windows 10 system I used FileZilla to FTP into my Raspberry Pi 4 Nas and move files back and fourth between the two.
Final Thoughts
The experience gained from creating a Nas from the Raspberry Pi 4 was fun. I learned a lot about Raids and the CLI in Raspbian OS. If I was to do this again I would get serious and use actual USB 3.0 hard drives. The thumb drives I used were USB 2.0 and really weren’t practical for this application. I guess it was a more see if I could rather if I should! In the picture below you can see I averaged 1.5 MiB/s when transferring the LinuxMint distro. It took about 20 minutes to transfer the file.

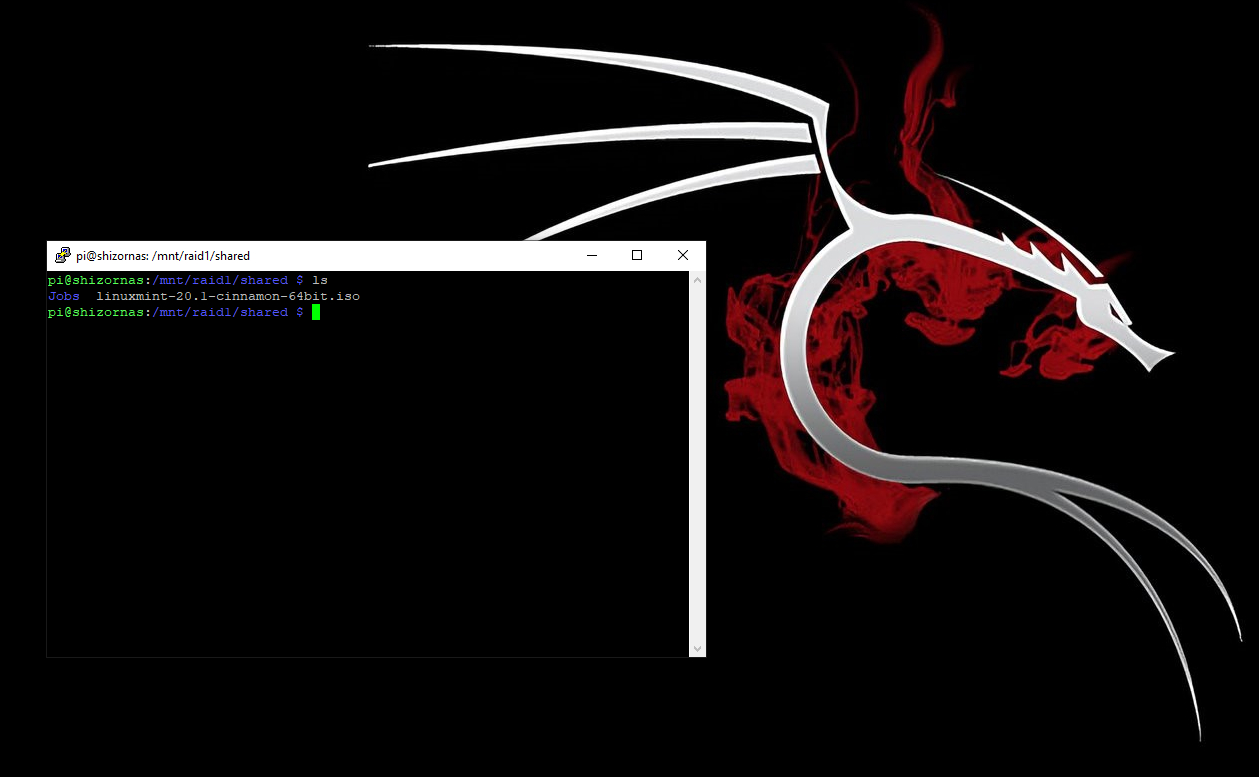
Below you can see my Putty screen showing the Folder location with my transferred LinuxMint file.

Filed under: Computers - @ April 22, 2021 1:06 am
Tags: Computers, NAS, Raid, Rapsberry Pi
